Need to get your WordPress from one host to another? It can be a lot easier than you think.
This blog post walks you through the steps to migrate your WordPress website from one host to another.
You’ve been with your current host for a while. But perhaps their price is starting to feel a little too high, or you are struggling to get the performance you need, or maybe it has been unreliable or just plain horrible to use. Many of the most popular (and lowest priced) web hosts are part of a much larger hosting operation who are the equivalent of puppy mills to web hosting. They are an affordable way to get started, but not a great place to look after a website that you value dearly.
All things considered: you have decided it is time to move your site to a new home.
You can do it yourself using the steps below, or if you prefer a fast, zero effort option we’ll do the work to move it to your Woop! Host managed WordPress site (often at no cost). Skip to the end for details.
Step 1: Grab your current site data
On your current WordPress setup (the original host) take a copy of the wp-content folder and the database.
All your files/data/themes/plugins should be in the wp-content folder by default. Unless you have some customisation this should be all you need in regards to files.
You may wish to download this backup to your PC, just in case.
Step 2: Copy the data to your new host
Put the backup files from your original host on the new host.
Need a new site? Woop! Host is Rimuhosting’s optimised WordPress hosting platform. It is a service a good number of our customers are now enjoying. We have done a lot of work on the back end to make sure things are fast, secure, and generally bulletproof, and easy to use. Woop! Host users don’t need to worry about SSL certificates or setting up the web hosting. All they need to do is to settle into their WordPress instance.
If you don’t have a new host selected or are not sure how to go about that, let us spin one up for you using the interface at https://woop.host/ and you’ll have all you need in a few minutes (zero technical skills required).
You can transfer your site files from the original host to the new host directly – if you have shell access on both ends. Otherwise, you can download from the original host to your PC, then upload from your PC to the new site.
Woop! Host supports SFTP. Which lets you easily transfer between computers on the Internet – even large files.
For more technical users – with ‘shell’ access – you can zip or tar.gz that and upload, then ssh in and unpack it on the new host itself.
Woop! Host likes to give you control, so for technical users you have ‘shell’ access to log into your Woop! Host site and run commands. e.g. to unpack/unzip archive files. And move them around to the right place. Shell access is handy as it lets you transfer files directly from the original host to the new host (without needing to download it to your local PC first).
If you are using a shell, you can copy the files around something like this:
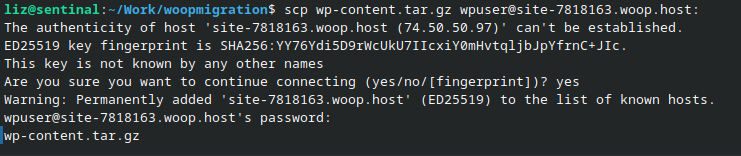
If you do not have shell access, use an FTP/SCP client like Filezilla ( tutorial )
Access your Woop! Host SFTP/SSH details at https://woop.host/cp/site.jsp like this:
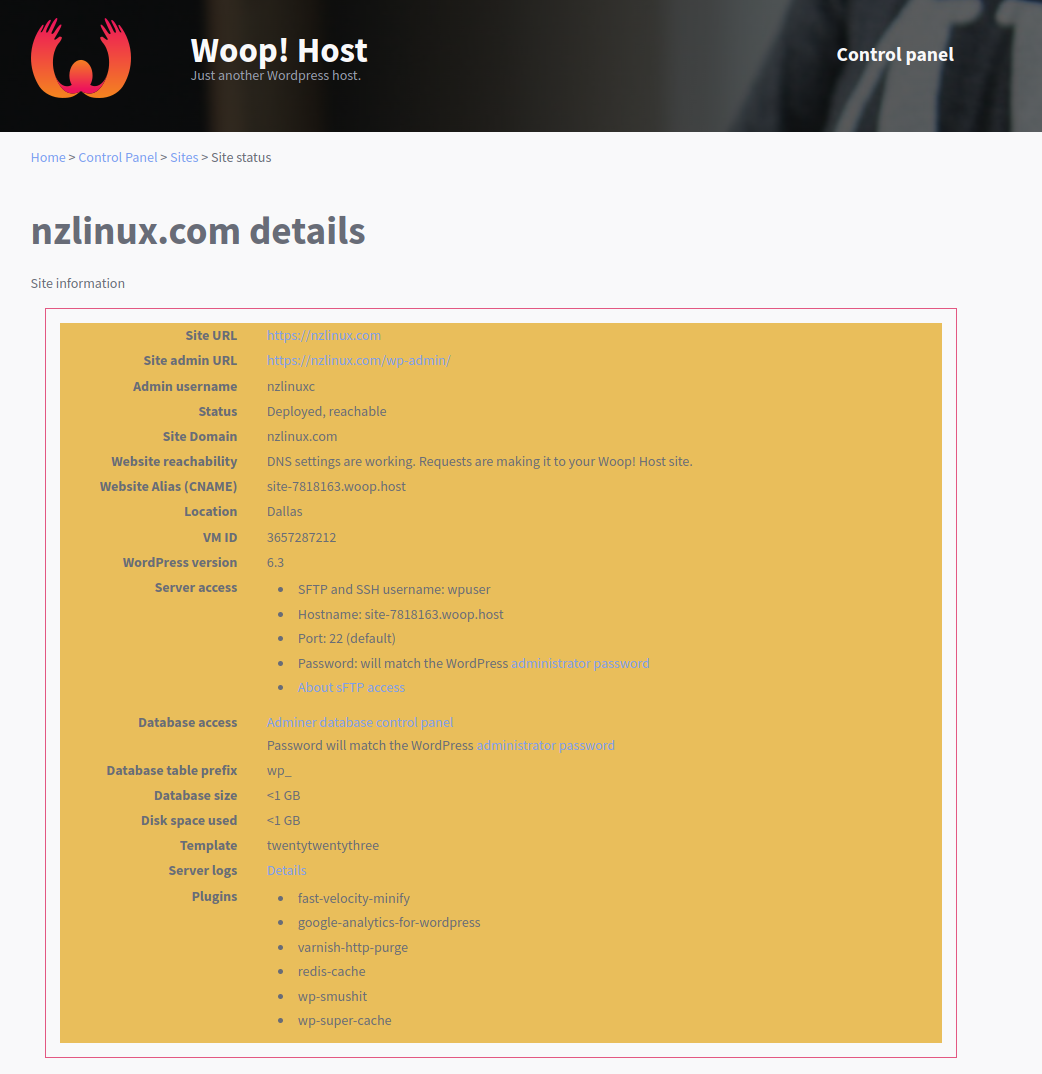
Unsure of your password? There is an option on that page to re-set your password. (And you’re able to use SSH keys with Woop! Host as well if you’re not a big fan of managing passwords).
Step 3: Extract your files
You then extract your backup into the right place on the new host. On Woop! Host you would use your shell/ssh access to do the extract to /var/www/wordpress:

Step 4: Import your database
Use your new host’s database importer to import the database from your original host.
On Woop! Host we use adminer (which has evolved out of the better known phpMyAdmin). Your Woop! Host Adminer details are listed at https://woop.host/cp/site.jsp
Once logged into Adminer, click on the ‘Import’ button and import your database
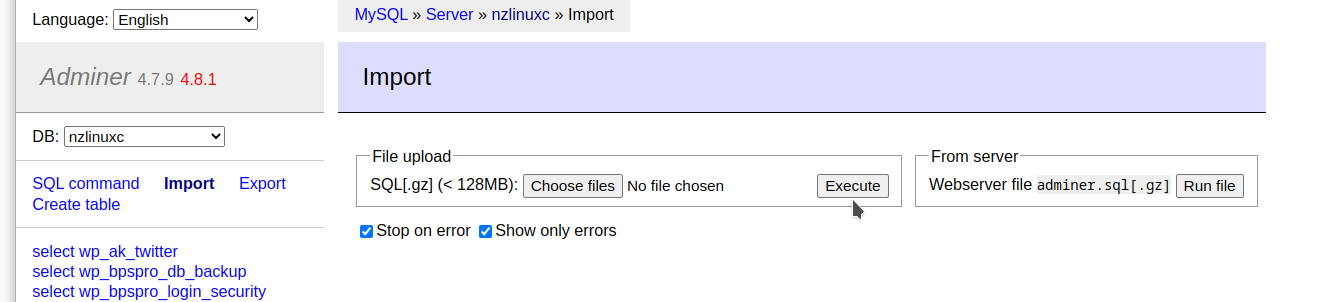
This allows you to import the file from your PC or the filesystem if you uploaded that already.
That’s it! Now you are done! Or you might be!
Gotchas: table prefixes
If your original wordpress instance had a non-standard database prefix (eg not wp_ ) then you will need to edit the wp-config.php and add a line like:
$table_prefix = 'your_prefix_';
(Use your prefix instead of your_prefix).
You can either download the wp-config.php from woop, edit and upload, or you can run something like the following command via ssh while on the new host:
echo "\$table_prefix = 'your_prefix_';" >> /var/www/wordpress/wp-config.php
Extra steps: plugins
Enable the following generally recommended plugins:
- fast-velocity-minify
- varnish-http-purge
- redis-cache
- wp-smushit
- wp-super-cache
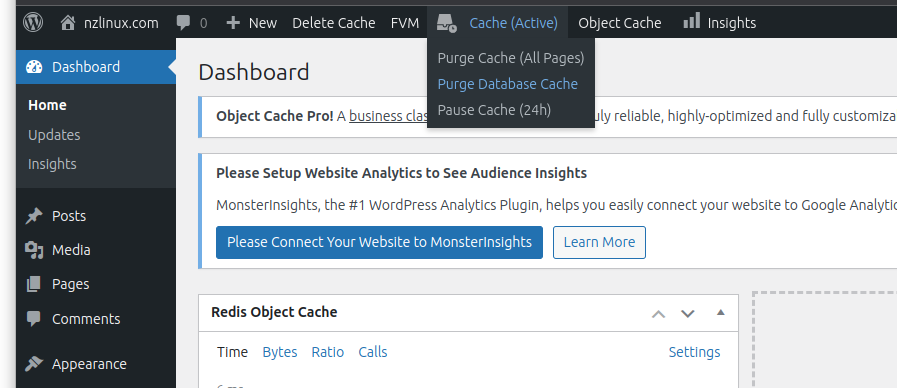
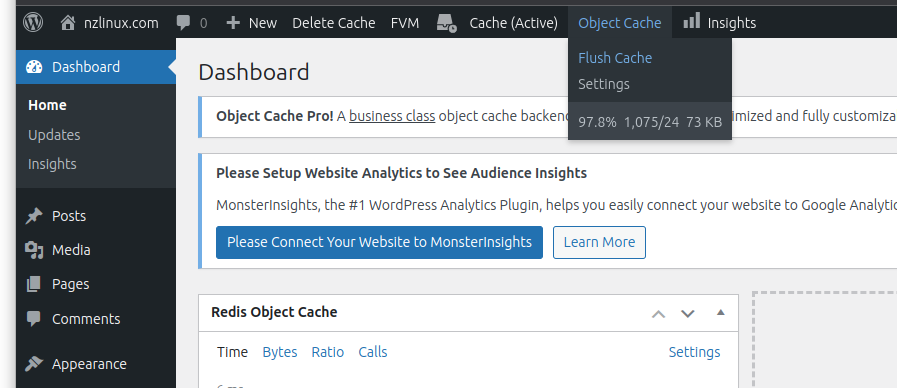
Extra steps: clear the cache
Make it a fresh start by clearing both Cache, and Object Cache using the wp-admin interface on your new WordPress site:
Update DNS
Now that things are migrated over you’ll want to point your DNS to the new host.
Woop! Host will let you know the correct DNS settings to use at https://woop.host/cp/site.jsp . Woop! Host will also let you use a temporary domain name (like site-somenumber.woop.host) so you can preview your site before switching to it. Look for the ‘Change the site domain’ option.
When you change the site domain using Woop! Host it will automatically update the links in your database to point to the new domain.
Install an SSL certificate
You can purchase and install an SSL certificate. Or your new host may have an option that lets you configure that.
If you are using Woop! Host, then we will automatically configure SSL for all the domains you tell us you’d like to use for the site (including automatically renewing them, and automatically changing things when DNS changes).
How about a zero effort ‘just make it happen’ migration instead?
Migrating a WordPress site between hosts requires following a few, sometimes simple steps. But since many of our clients are time poor and would rather things ‘just happen’ we also offer a fully managed Woop! Host WordPress migration service.
Right now we are offering a (limited) number of migrations each week for no extra cost. Get in touch!
If you’d like us to migrate things, just order your Woop! Host site, then follow up with us about where (or how) we can get the files from the original host. And we’ll take care of the migration for you.